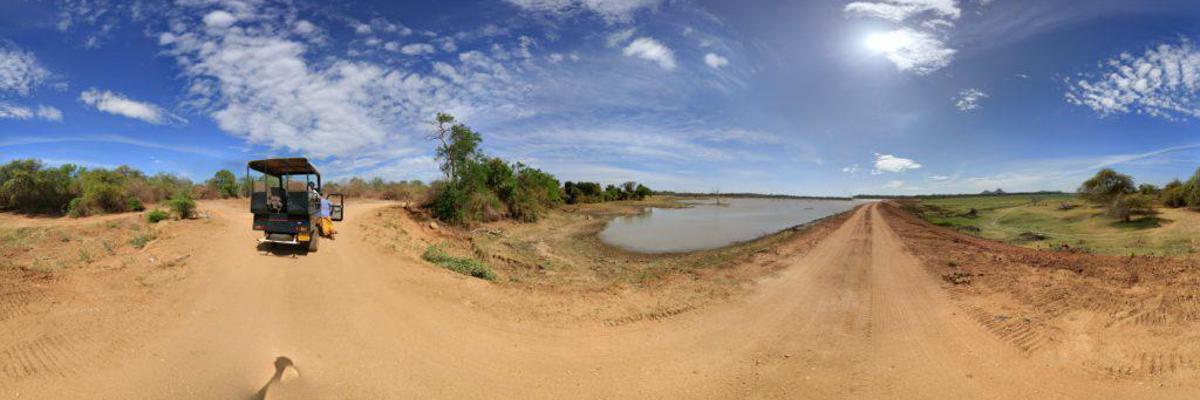
As I have promised last time, today I would like to show you how to create a Tiny Planet – like picture. You will need basically two things: panorama picture and Adobe Photoshop. The best panorama, from my experience, is the one based on the 360°. The reason is quite simple – in this kind of photo edges are creating a smooth connection and no stitching is visible. 360° panorama can be easy recorded using 360° camera (which is still rare equipment) or smartphone with a gyroscope and Google Street View app (which you can find here: Google Street View). The app is automatically stitching panorama to 360° photo, but fortunately, there is also a local copy of a picture in standard plane form saved as a jpeg – and this picture I have taken for Tiny Planet. You can also use another kind of panoramas but the result might not be that good.
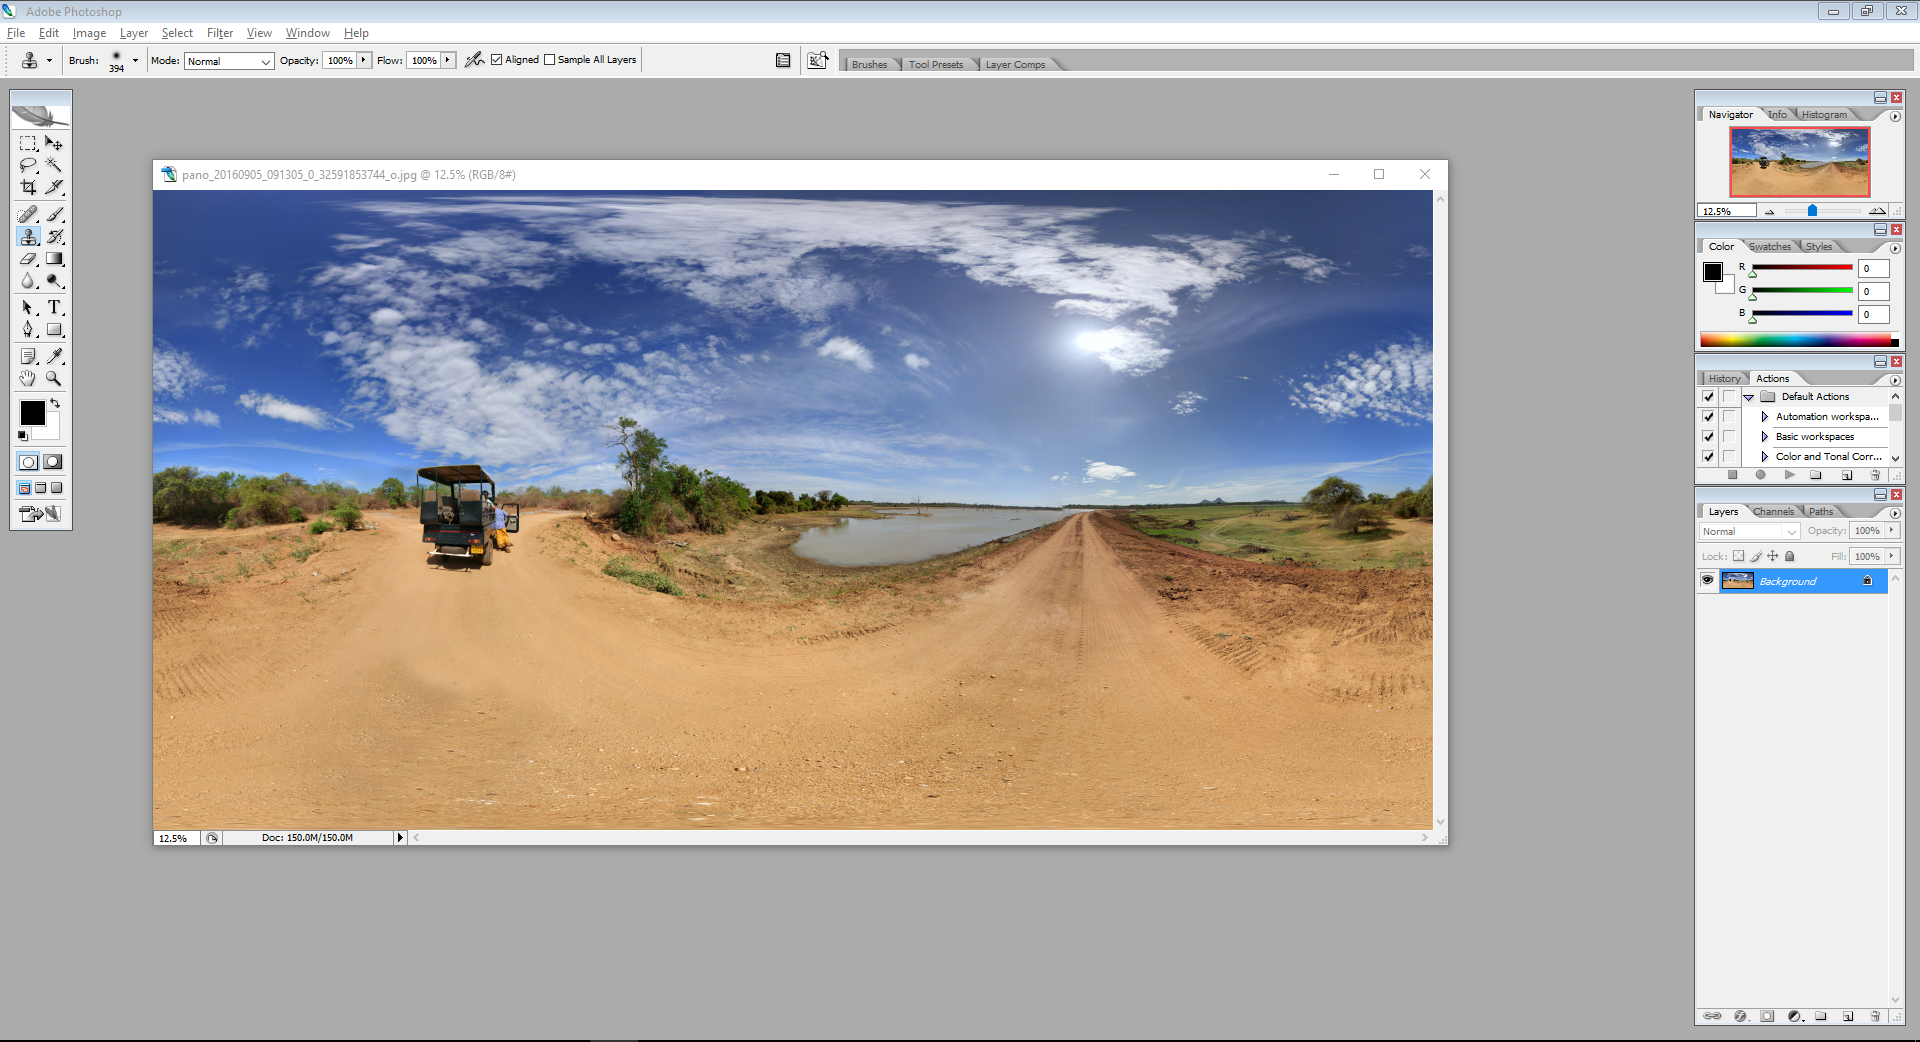
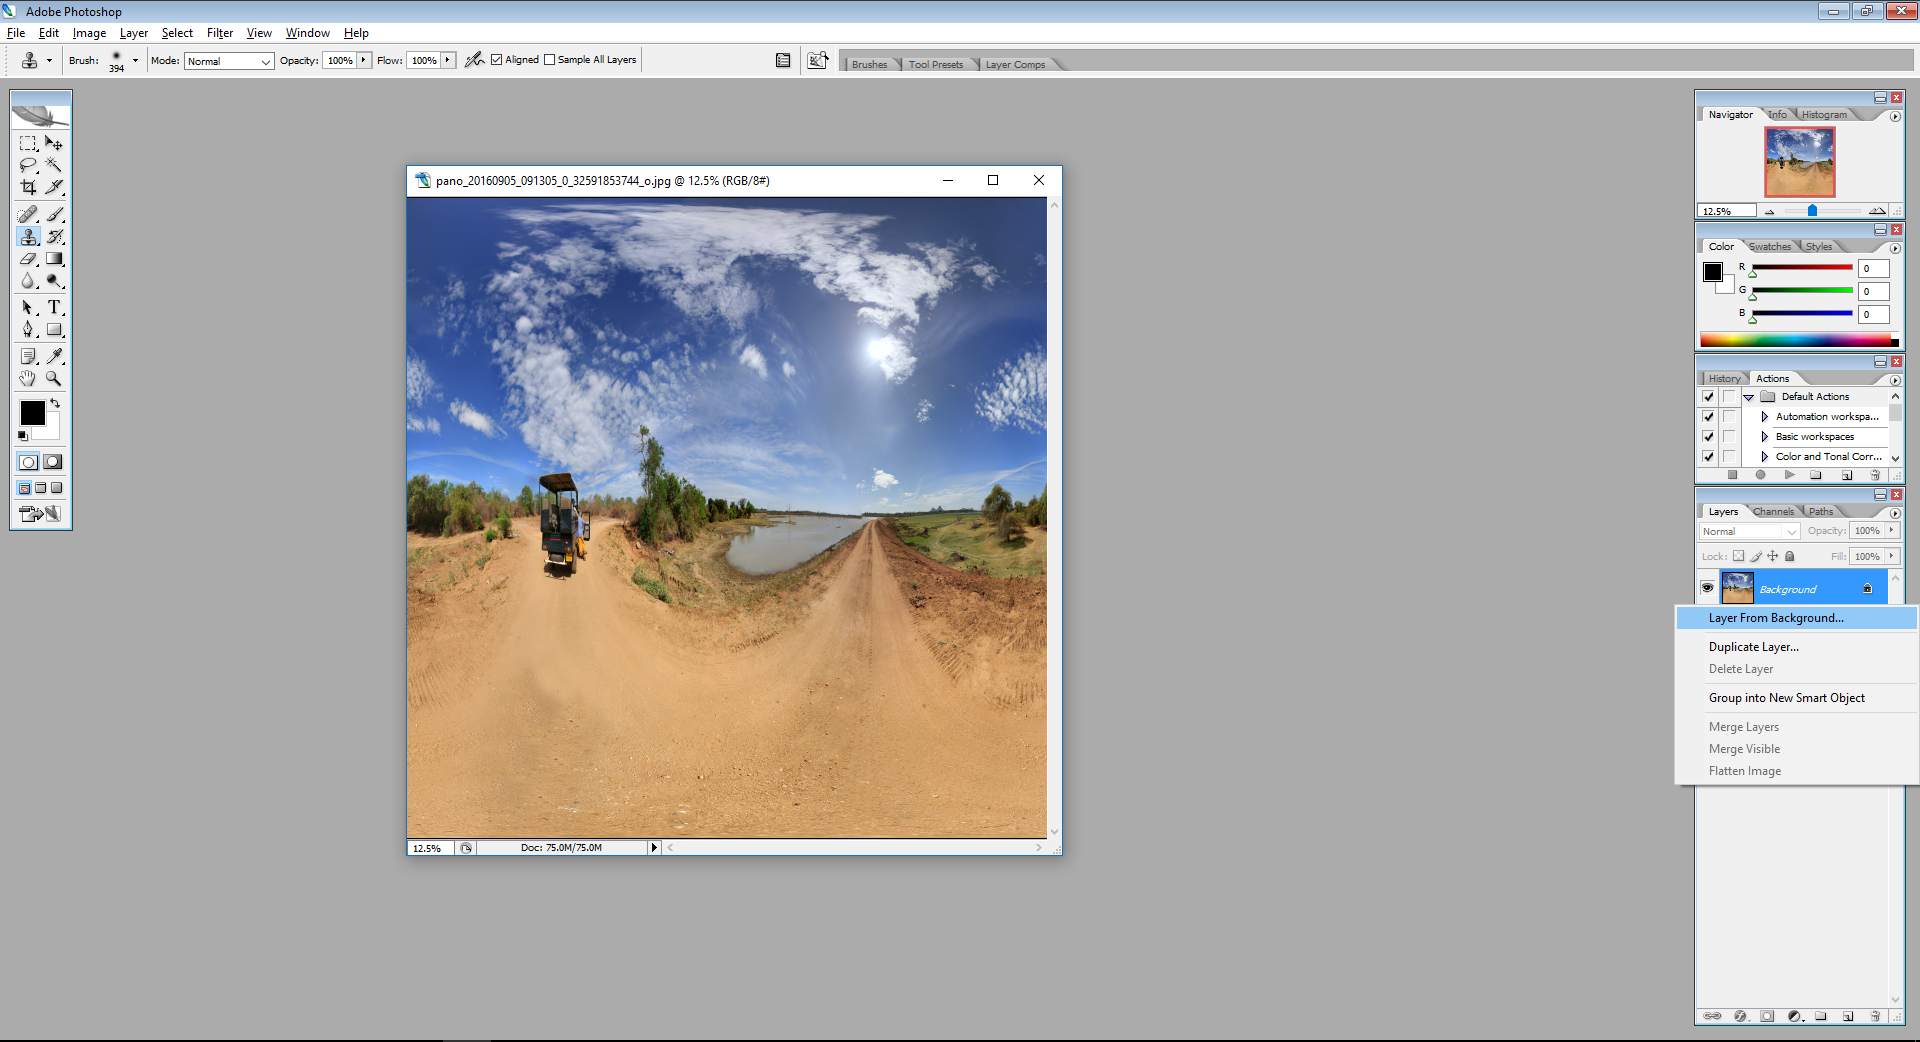
Now Photoshop – the option which is needed for Tiny Planet creation are available in all Photoshop versions starting from CS2 (which was free to download from Adobe website, but now available here: Adobe Photoshop CS2). You can also download a trial version of extremely expanded and sophisticated Photoshop CC (Photoshop CC). First of all, open a panorama file in Photoshop:
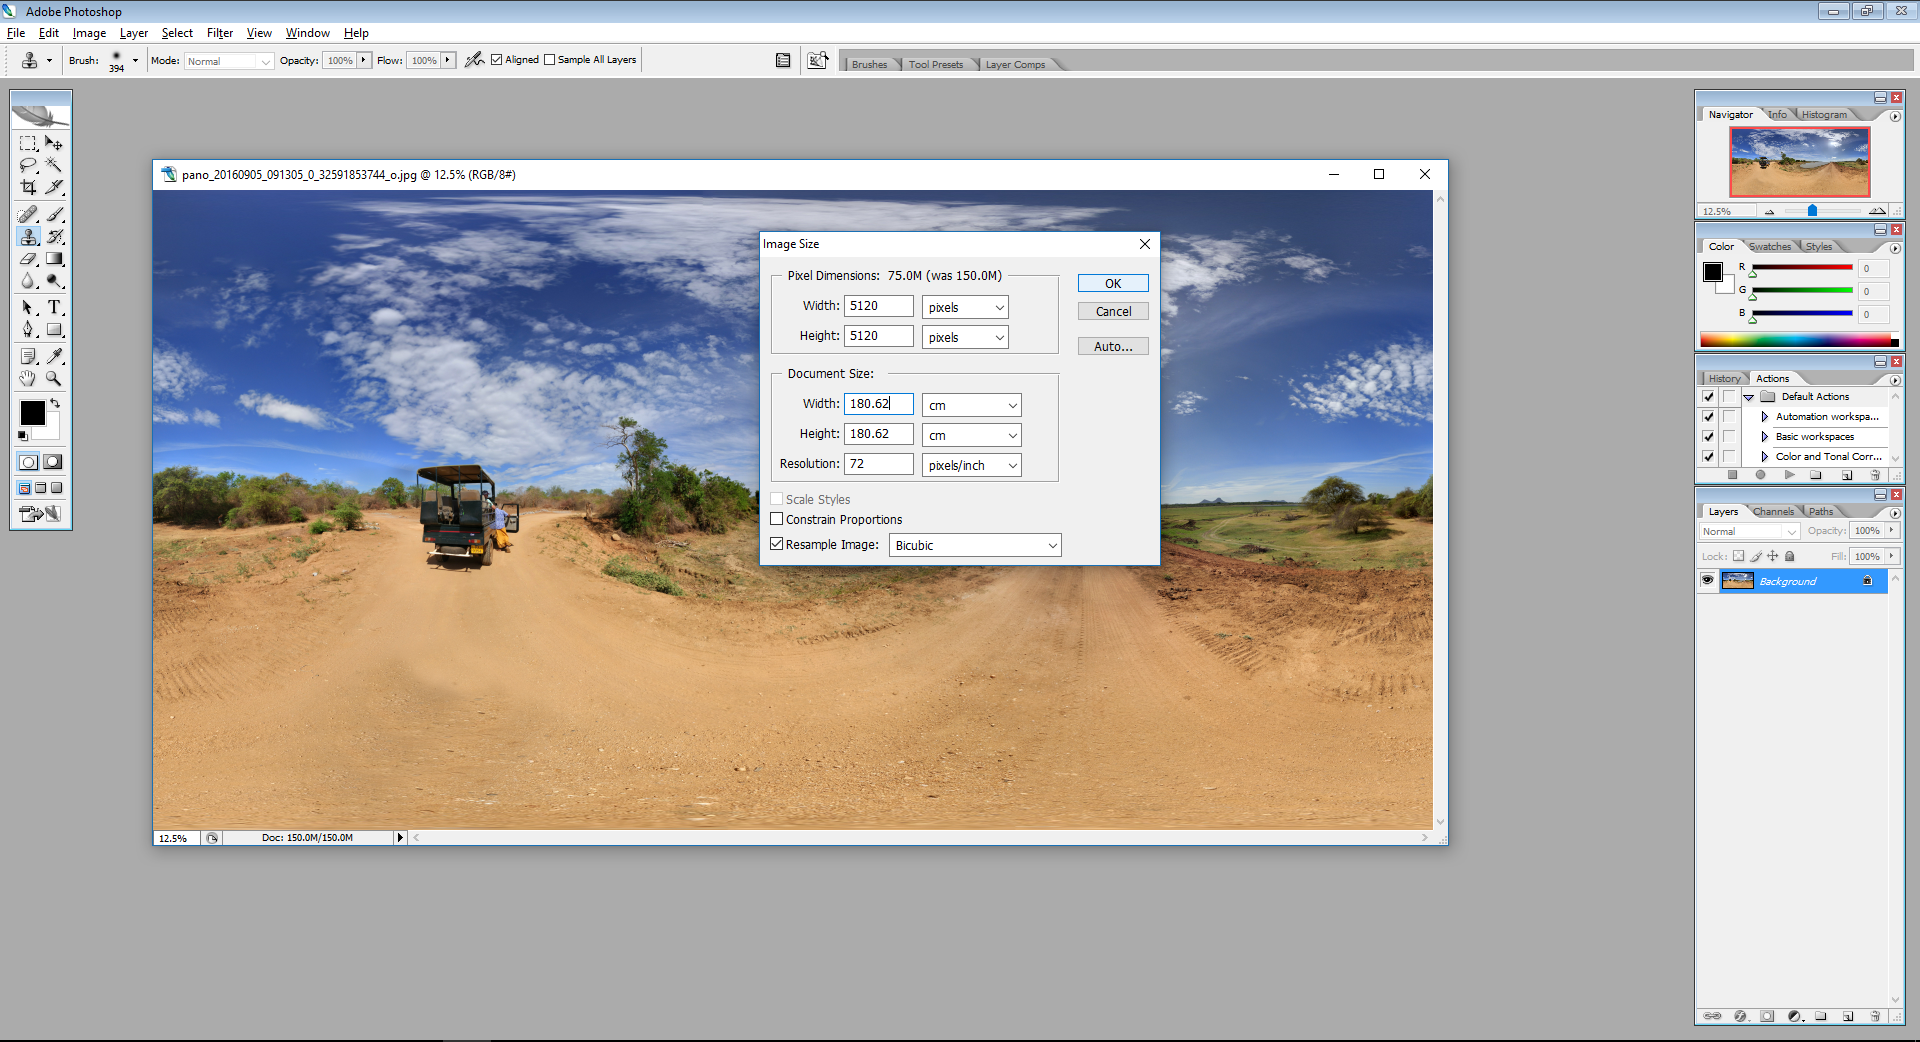
Then change the picture size to the square and disable the theme adjustment. Change the width to the same size as length and press OK.
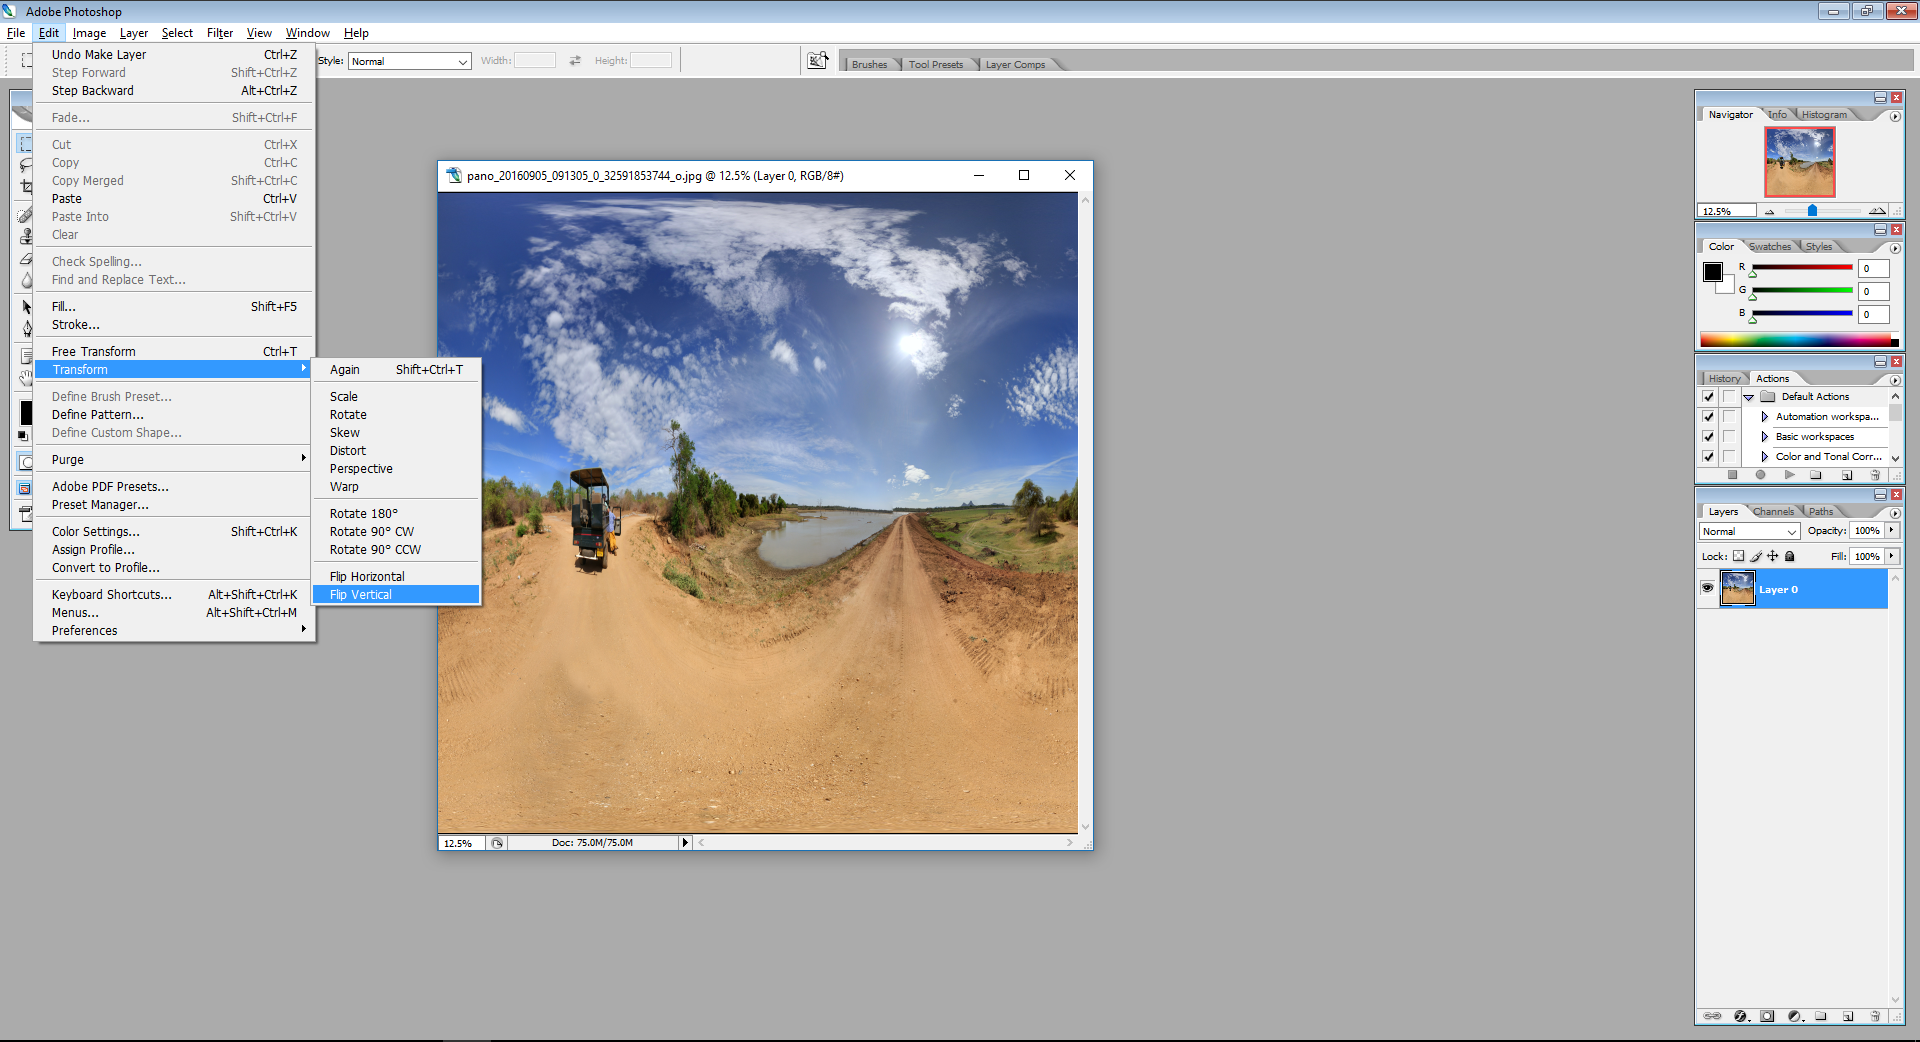
Now it is important to transform the picture using horizontal flip. But first make a layer from background:
Now the last step which will produce the sphere. Go to Filters, Distortion and Polar coordinates. Confirm with OK.
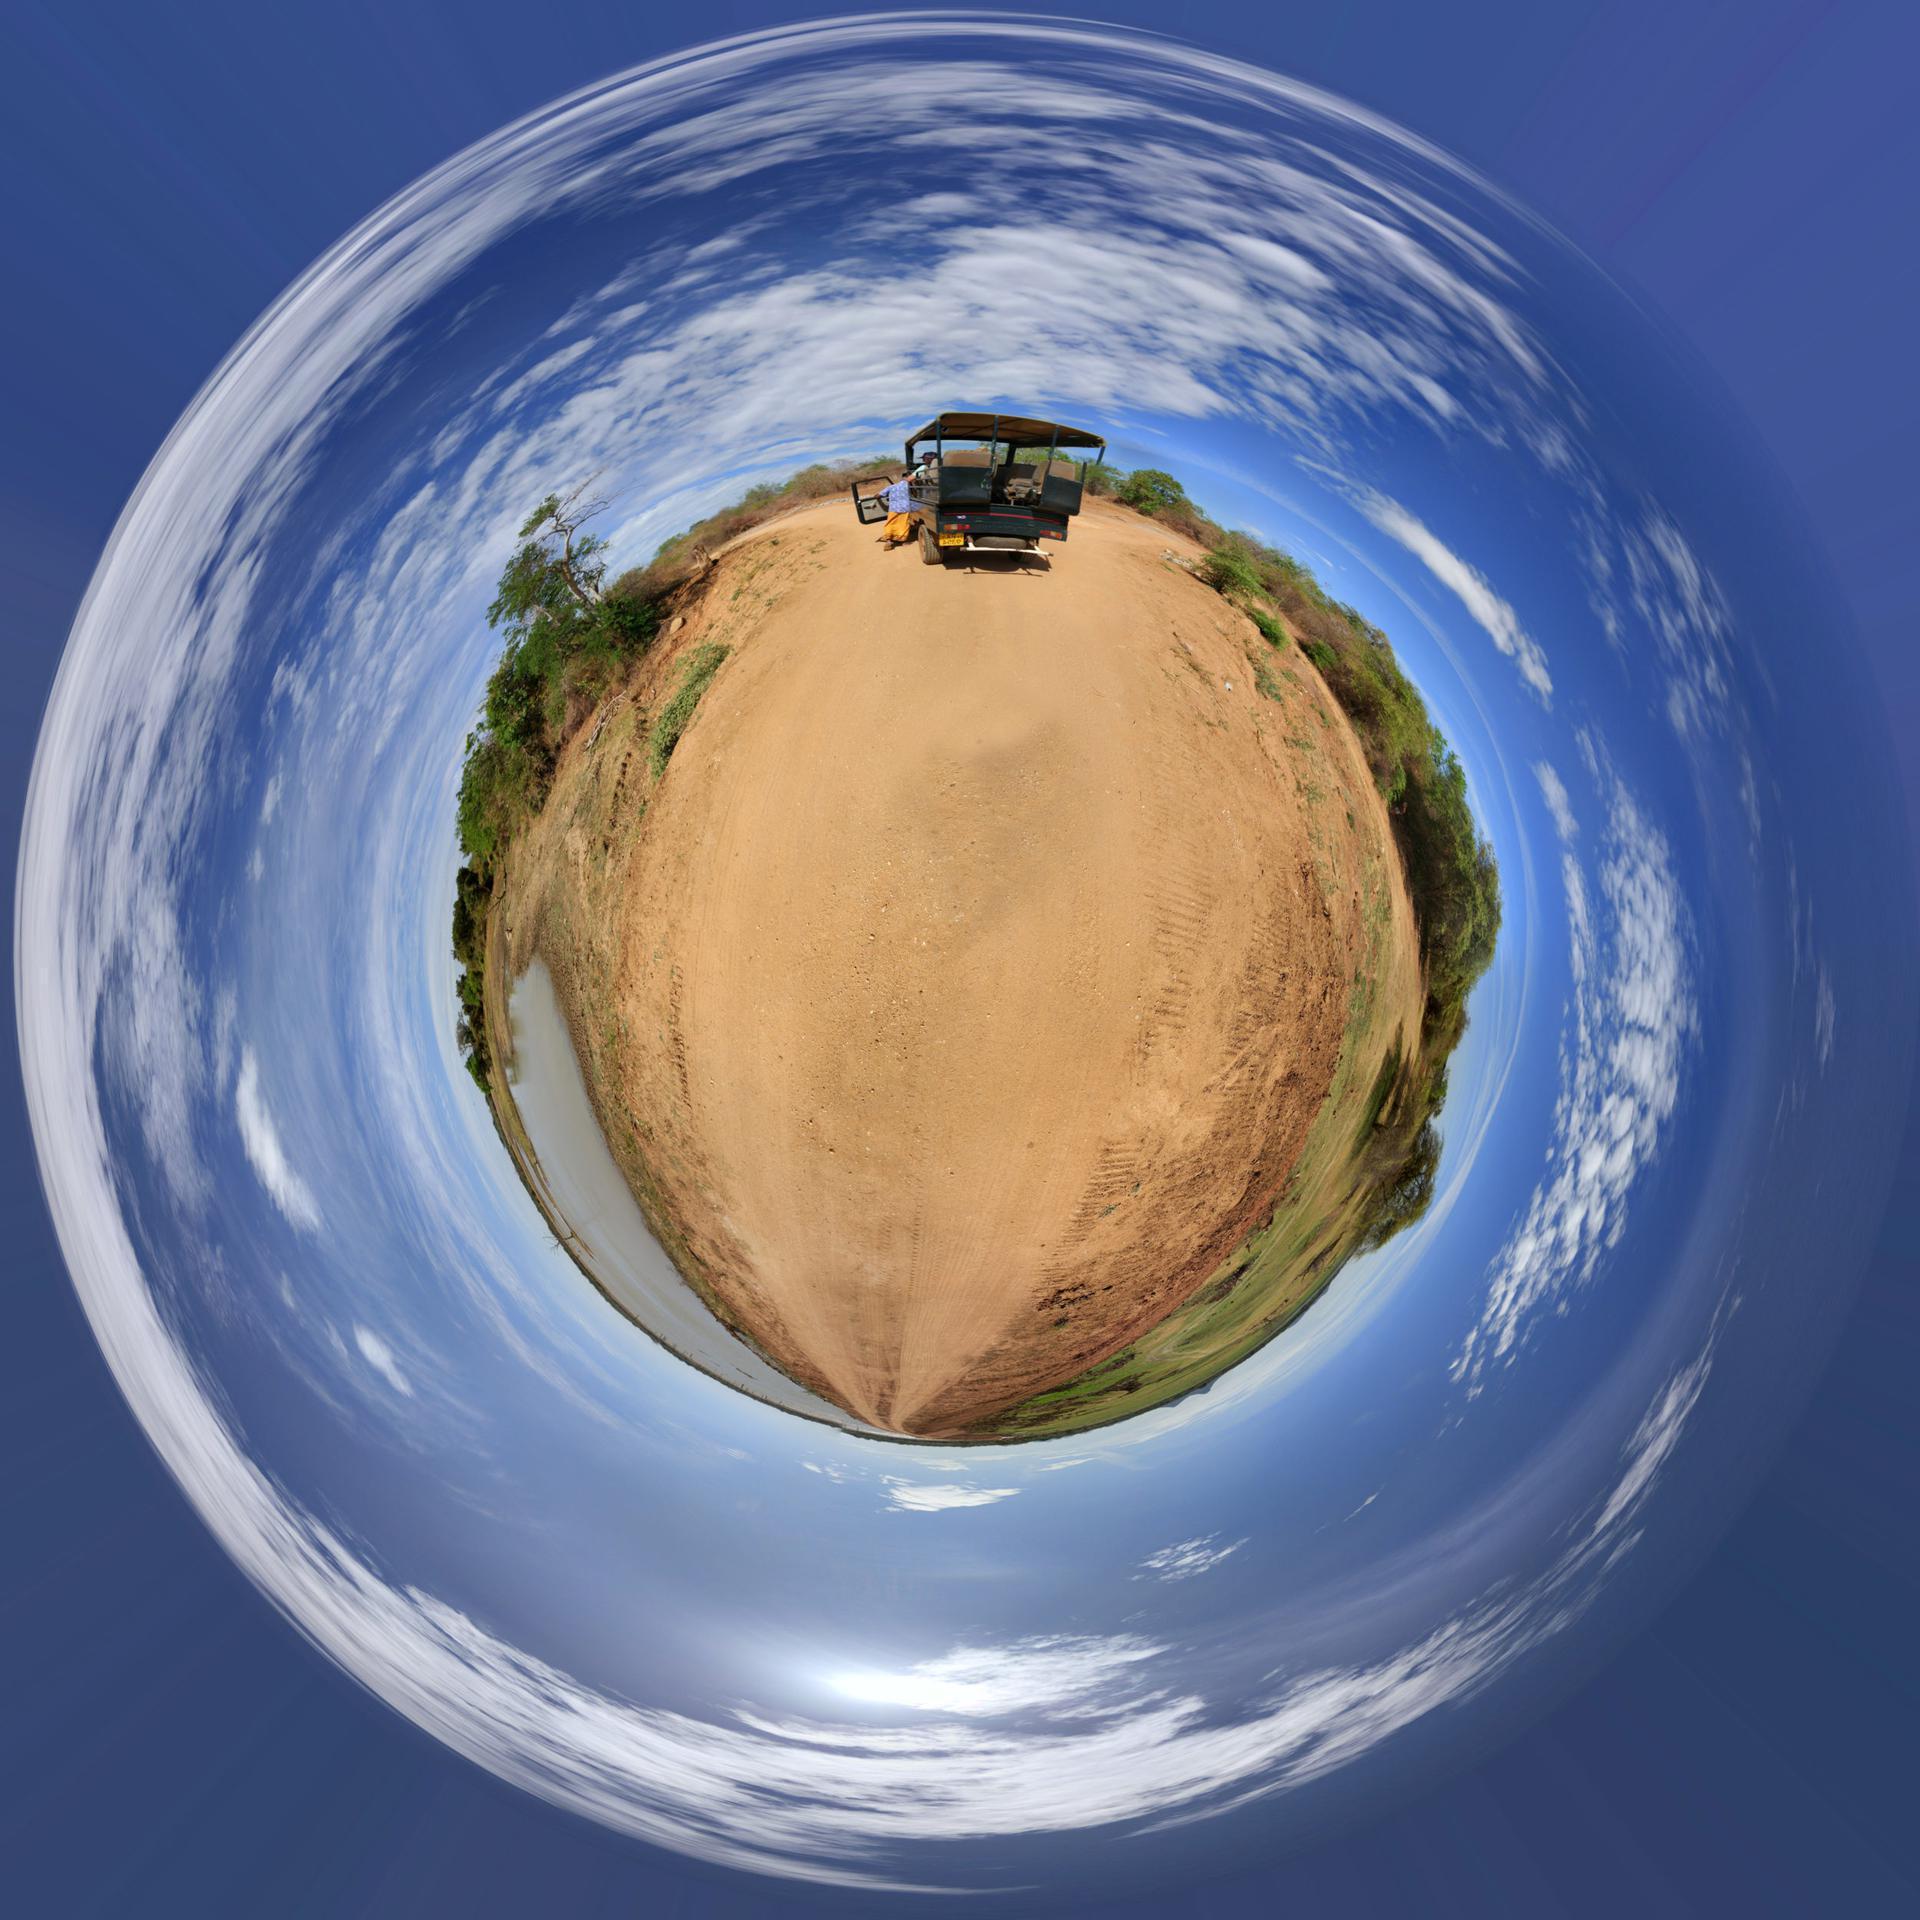
Tadaam! You have created the Tiny Planet. If you are using newer version of Photoshop, you can easily fix some problems with picture matching using clone stamp or fixing brush. When you are ready and Tiny Planet looks great you can save the picture as a new file. With this four easy steps, you can create really cool pictures which show panoramas in a new way.